Pages

Showing posts with label binding. Show all posts

Tuesday, October 26, 2010

Tuesday Tip: A Time Saving Tool for this Holiday Season

I have been sewing and crafting since I was 12 years old and making quilts for a few years now. It makes me embarrassed to admit that I had never used a tool that many others would consider so basic. It is a bias tape maker! They have been around for years but I never thought of using one until this summer as I was preparing our Christmas in July presentation and now I can’t live without it!


I was making a fabric Christmas ornament called “The Coiled Fabric Snowflake Ornaments” by Designs to Share with You. The pattern mentioned using fabric strips with the bias tape maker and Steam a Seam fusible tape to create these beautiful snow flakes. By guiding the fabric through the bias tape maker it was so easy to press the fabric and create the perfectly folded strips to coil into the snowflake shapes.
Coiled Fabric Snowflake Ornaments
I was so impressed with my new found tool that I then used it to complete some placemats I was making. Instead of merely using “ready-made,” packaged bias tape, I bought coordinating fabric and made my own bias tape to bind my placemats. What a difference it made in the finished look of my project!

The Bias Tape Makers are made by CLOVER and come complete with instructions in five sizes; from ¼ inch to 2 inches (I now own them all!). I am using them for all my Christmas gifts that call for bias tape or binding, everything from quilts to pot holders. What a time saver during this busy time of year, my only regret is that I didn’t discover them sooner!
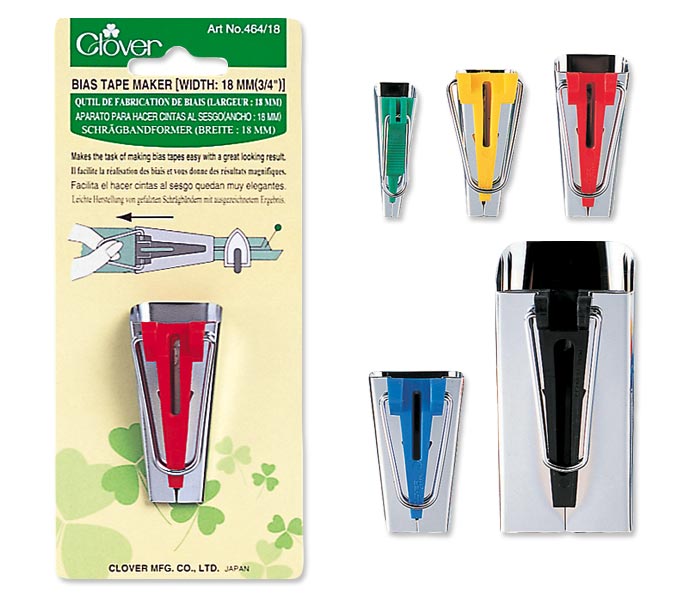
Clover Bias Tape Makers in all 5 sizes
~ Chris
(Our Asst Manager at the Everett store, resident Demo Queen and company spokesperson)

Tuesday, September 21, 2010

Tuesday Tip: No More Tangles Binding Solution


There are few things more satisfying than sewing the binding on a quilt. You've finished with the piecing, sandwiching, quilting, and trimming, and all that is left is getting that binding on. But then you are confronted with the tangled pile of yards of binding, picking up scraps and stray threads (not to mention dog hair at my house!) from the floor as you work, and it takes some of the satisfaction away.  My lovely quilting friend Lynn gave me this awesome trick, and I use it all the time.

I keep an extra empty thread spool around - one of the larger ones, from a larger spool. I make my binding,  and wind it on the spool. 


There is a post on my sewing machine for using cone threads, or perhaps for a second spool for twin needle work - I usually just use mine to store extra empty bobbins.

When I am ready to sew on my binding, I just put the spool of binding onto that post, pull down the end that I am starting to sew on, and start stitching. The binding winds off smoothly, stays clean and untangled, and I get to enjoy putting the binding on.


Thanks Lynn, for the great suggestion!  I use it all the time - and now all of you can, too!

~ Anna-Beth